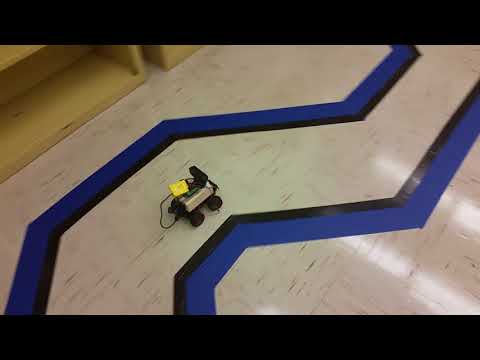
DeepPicar is a low-cost autonomous RC car platform using a deep convolutional neural network (CNN). DeepPicar is a small scale replication of NVIDIA's real self-driving car called DAVE-2, which drove on public roads using a CNN. DeepPicar uses the same CNN architecture of NVIDIA's DAVE-2 and can drive itself in real-time locally on a Raspberry Pi.
Install DeepPicar.
$ sudo apt install libatlas-base-dev
$ git clone --depth=1 https://github.com/heechul/DeepPicar-v3 -b devel
$ cd DeepPicar-v3
$ sudo pip3 install -r requirements.txt
Edit params.py to select correct camera and actuator drivers.
The setting below represents the standard webcam and drv8835 configuration, for example.
camera="camera-webcam"
actuator="actuator-drv8835"
In addition, you need to install necessary python drivers. For polulu drv8835, do following.
$ git clone https://github.com/pololu/drv8835-motor-driver-rpi.git
$ cd drv8835-motor-driver-rpi
$ sudo python3 setup.py install
$ sudo python3 deeppicar.py
The key commands for controlling the DeepPicar are as follows:
- 'a': move forward
- 'z': move backward
- 's': stop
- 'j': turn left
- 'l': turn right
- 'k': center
- 'r': toggle recording
- 'd': toggle autonomous driving
- 'q': quit
Use the keys to manually control the car. Once you become confident in controlling the car, collect the data to be used for training the DNN model.
The data collection can be enabled and stopped by pressing r key. Once recording is enabled, the video feed and the corresponding control inputs are stored in out-video.avi and out-key.csv files, respectively. Later, we will use these files for training.
Rename recorded avi and csv files to out-video-XX.avi and out-key-XX.csv where XX with appropriate numbers.
Compress all the recorded files into a single zip file, say Dataset.zip, and copy the file to the host PC.
$ zip Dataset.zip out-*
updating: out-key.csv (deflated 81%)
updating: out-video.avi (deflated 3%)
Move the dataset to your PC.
$ python3 -m http.server
On your PC, use your browser to download the dataset file by entering https://<ip_addr_of_your_pi>:8000/Dataset.zip
Open the colab notebook. Following the notebook, you will upload the dataset to the colab, train the model, and download the model back to your PC.
After you are done trainig, you need to copy the trained tflite model file (large-200x66x3.tflite by default) to the Pi as follow (alternative, you can simply copy the file via scp instead).
$ python3 -m uploadserver --directory models/
On your PC, use your browser to upload the tflite model file to the Pi.
On the browser URL bar, enter http://<ip_addr_of_your_pi>:8000/upload.
Then, select the downloaded tflite file via Browse... and click Submit Query to upload the file.
Copy the trained model to the DeepPicar.
Enable autonomous driving by suppling -d command line argument as below.
$ sudo python3 deeppicar.py -d
You can start/stop autonomous driving by pressing d key while running the program.
Note that you still need to initiate a forward movement by pressing a because the DNN only controls steering.
Some other examples of the DeepPicar driving can be found at: https://photos.app.goo.gl/q40QFieD5iI9yXU42