This project is intended for college assignments, and has simple display features and also has a database using MySQL
- First you have to install the Java JDK from your default repository as below.
apt update
apt install default-jdk- Check and verify the java JDK version
java -version- Now open your browser and go to the Netbeans IDE page. If you want to download using a browser, please, in this tutorial I will use wget as a tool to download it.
wget -c https://dlcdn.apache.org/netbeans/netbeans/16.0/Apache-NetBeans-16.0-bin-linux-x64.sh- After the download is complete navigate the terminal to the download directory of the file run this command to execute the installer.
chmod +x Apache-NetBeans-16.0-bin-linux-x64.sh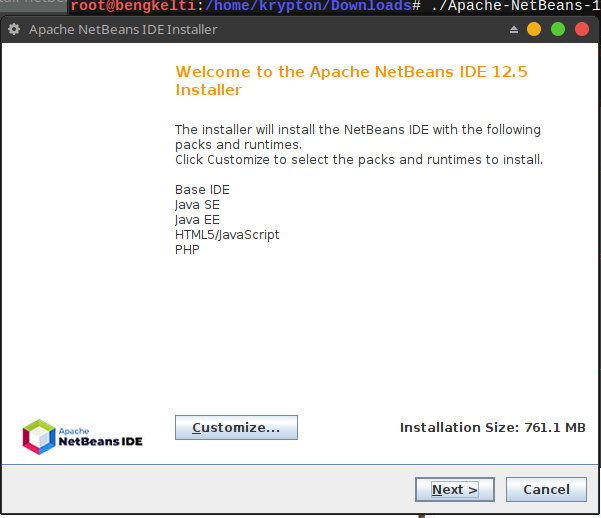
./Apache-NetBeans-16.0-bin-linux-x64.sh- After running the command, the Netbeans IDE install has been executed and will display the Welcome To Apache Netbeans display. Click next to continue and customize to suit your choice.
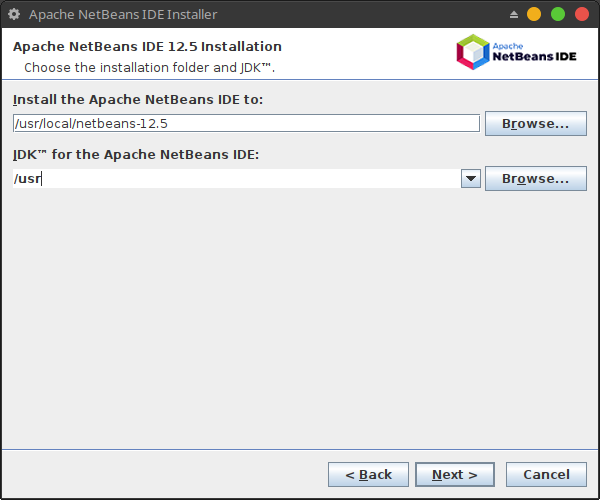
- Please specify the Netbeans IDE install directory and also the JDK version to be used. Click to continue installing the Netbeans IDE. “Change the JDK directory for the Apache Netbeans IDE to /usr/lib/jvm/default-java/”.
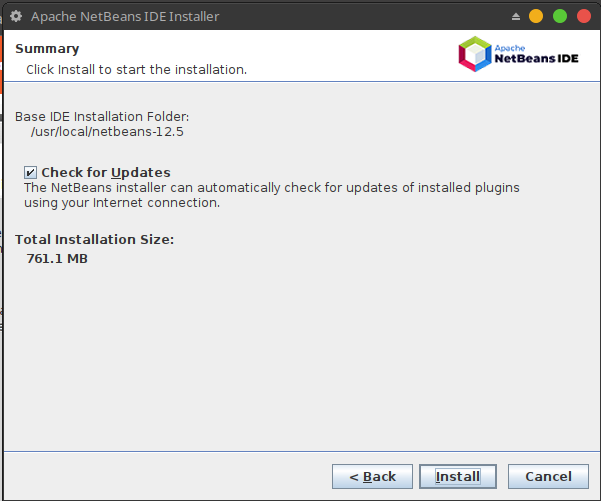
- Next, enable automatic updates for installed plugins via the checkbox on the following screen, and click Install to install the NetBeans IDE and runtimes.
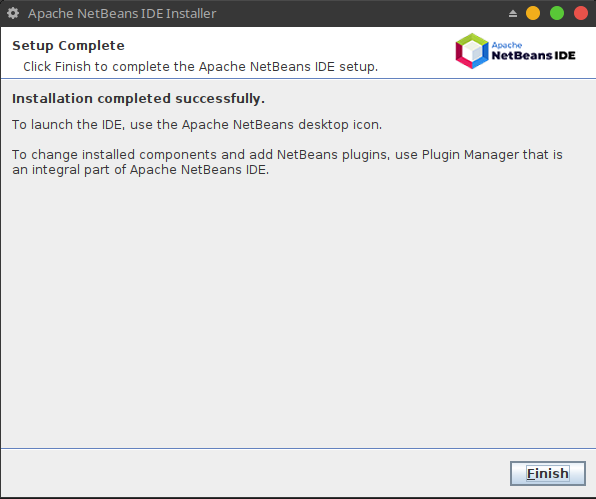
- When the installation is complete, click Finish and restart the machine to enjoy NetBeans IDE.
Start XAMPP control panel (If you haven’t yet installed XAMPP, visit https://www.apachefriends.org/index.html for installation information.) On the control panel. Start Apache and MySQL.
NetBeans IDE supports the MySQL, a relational database management system. Before we can access the MySQL Database Server in NetBeans IDE, configure the MySQL Server properties.
Start NetBeans IDE (If you haven’t installed NetBeans, visit https://netbeans.org/downloads/ for installation information.)
Right-click the Databases node in the Services tab and choose Register MySQL Server... to open the MySQL Server Properties dialog box. Enter the MySQL server host name, port number and administrator information as shown in the picture below.
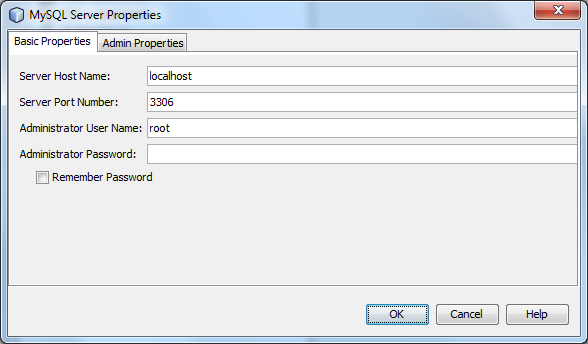
A blank password can also be a password though it should never be used for production version.
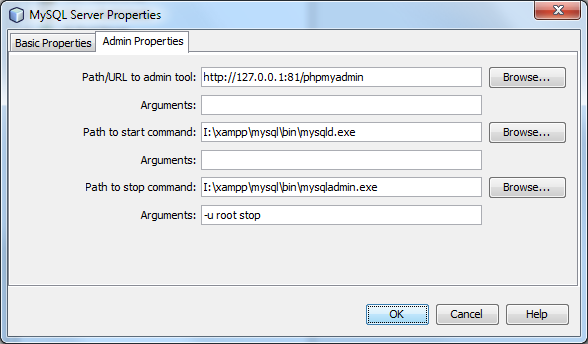
Click the Admin Properties tab at the top of the dialog box.
This tab allows us to enter information for controlling the MySQL Server.
In the Path to start command field, type or browse to the location of the MySQL start command. To find the start command, look for mysqld in the bin folder of the XAMPP installation directory.
In the Path to stop command field, type or browse to the location of the MySQL stop command. This is usually the path to `mysqladmin in the mysql/bin folder of the the XAMPP installation directory.
If the command is mysqladmin, in the Arguments field, type -u root stop to grant root permissions for stopping the server.
The following picture shows the content that should be similar except that the drive letter will most likely be different.
If finished press OK button. If the configuration is correct, in the Services tab window, a new database instance MySQL Server at localhost:3306 [root] should appear as a node under the Databases Explorer node.
Expand the database instance node. The list will show all the databases that are available in the MySQL server.

Be sure that the MySQL Database Server is running. If the instance is disconnected, right click the instance node and choose connect.
Starting from here, the following steps, creating a new MySQL database, are covered in the post Creating a New MySQL Database in NetBeans IDE.