![]()
- FLL management system for scoring, displaying and simplifying events. Built in Rust & Flutter, distributed in Docker, IOS, Android and Desktop applications
| Project Status | Pulls | Version | Size |
|---|---|---|---|
 |
 |
 |
- This project is split into two distinct application, Server and Client
- Both applications can be installed separately in their own native platforms.
- The server can be run in Debian linux, Windows ^8 and MacOs
- The client is built in flutter and officially supports iOS, Android, Debian linux, Windows ^8 and MacOs
- The project is also bundled into a docker image which contains the linux variant of the server & web compiled variant of the client.
- Most TMS Server and Client binaries can be found on the release page. However, some signed binaries are not available such as windows msix installers or iOS ipa binaries. View below for specific installs.
| Binary | Link | Status |
|---|---|---|
| Client IOS | App Store |  |
| Client Android | Github Releases |  |
| Client Windows | Github Releases |  |
| Client Linux | Coming Soon |  |
| Server Windows | Github Releases |  |
| Server Linux | Github Releases |  |
| Server MacOs | Github Releases |  |
| Binary | Status |
|---|---|
| Docker Image |  |
- The docker image is the most recommended method for installing the project as it provides a stable up to date version that is simple to use and deploy.
- Install Docker
- Pull the image
- Pull the image using the following command
docker pull cjbuchel/tms, alternatively pull usingdocker pull cjbuchel/tms:<version>for a specific version.
- Pull the image using the following command
- Running the image in a container
- For an AIO (all in one) container run
docker run -d -it --network host -p 8080:8080 -p 2121:2121 -p 2122:2122 -p 5353:5353 --name tms cjbuchel/tms - Breaking down the command
- The prior command runs the container in the background using the
-dflag - The command also exposes the following ports
8080,2121,2122&53538080is the Web Server port and is the port used when navigating to the web client. I.ehttp://10.0.100.15:8080. The port is not specialized and can be switched to another if desired. I.e-p 8080:3000- Ports
2121&2122are for the server connections and shouldn't be changed,2121is for http and mainline data requests, and2122is for quick information bursts and pub sub updates (like the timer) - Port
5353(Optional) is the port used for mDNS broadcasting. mDNS provides a way for non web compiled clients to scan and connect to the server if they're on the same subnet. While it's not critical, it does provide a layer of simplified networking for devices such as iPads or mobile devices. Allowing users to connect without needing to enter the server address. Or in the event that the host ip changes, it provides an automated manner for the client to scan and reconnect using the new IP.
--network hostforces the container to use the host machines network configuration, rather than relying on it's own. This is not critical and is only useful if mDNS is enabled and port5353is exposed. As the broadcaster needs to broadcast the server (host machine) ip, not the internal docker ip. View https://docs.docker.com/network/network-tutorial-host/ for more information
- The prior command runs the container in the background using the
- Optional environment parameters
- The image offers options for configuring the container for different operating modes.
- Pass in any of the following by appending the command i.e
docker run ... cjbuchel/tms --no-client--no-client--no-server
- For an AIO (all in one) container run
- Once the server has been started navigate to the client (either through the hosted web address) or through the application
- For example
localhost:8080
- For example
- Either wait for a network connection by monitoring the header messages (if on the web or using mDNS).
- Or navigate to the connection page in the top right corner and manually enter the ip. Afterwards go back to view selector screen
- Once you have connected to the server and no header messages are displayed in the app bar. Login through the button in the top right.
- On the first startup only one user will be active,
adminwith a password ofpassword.
- On the first startup only one user will be active,
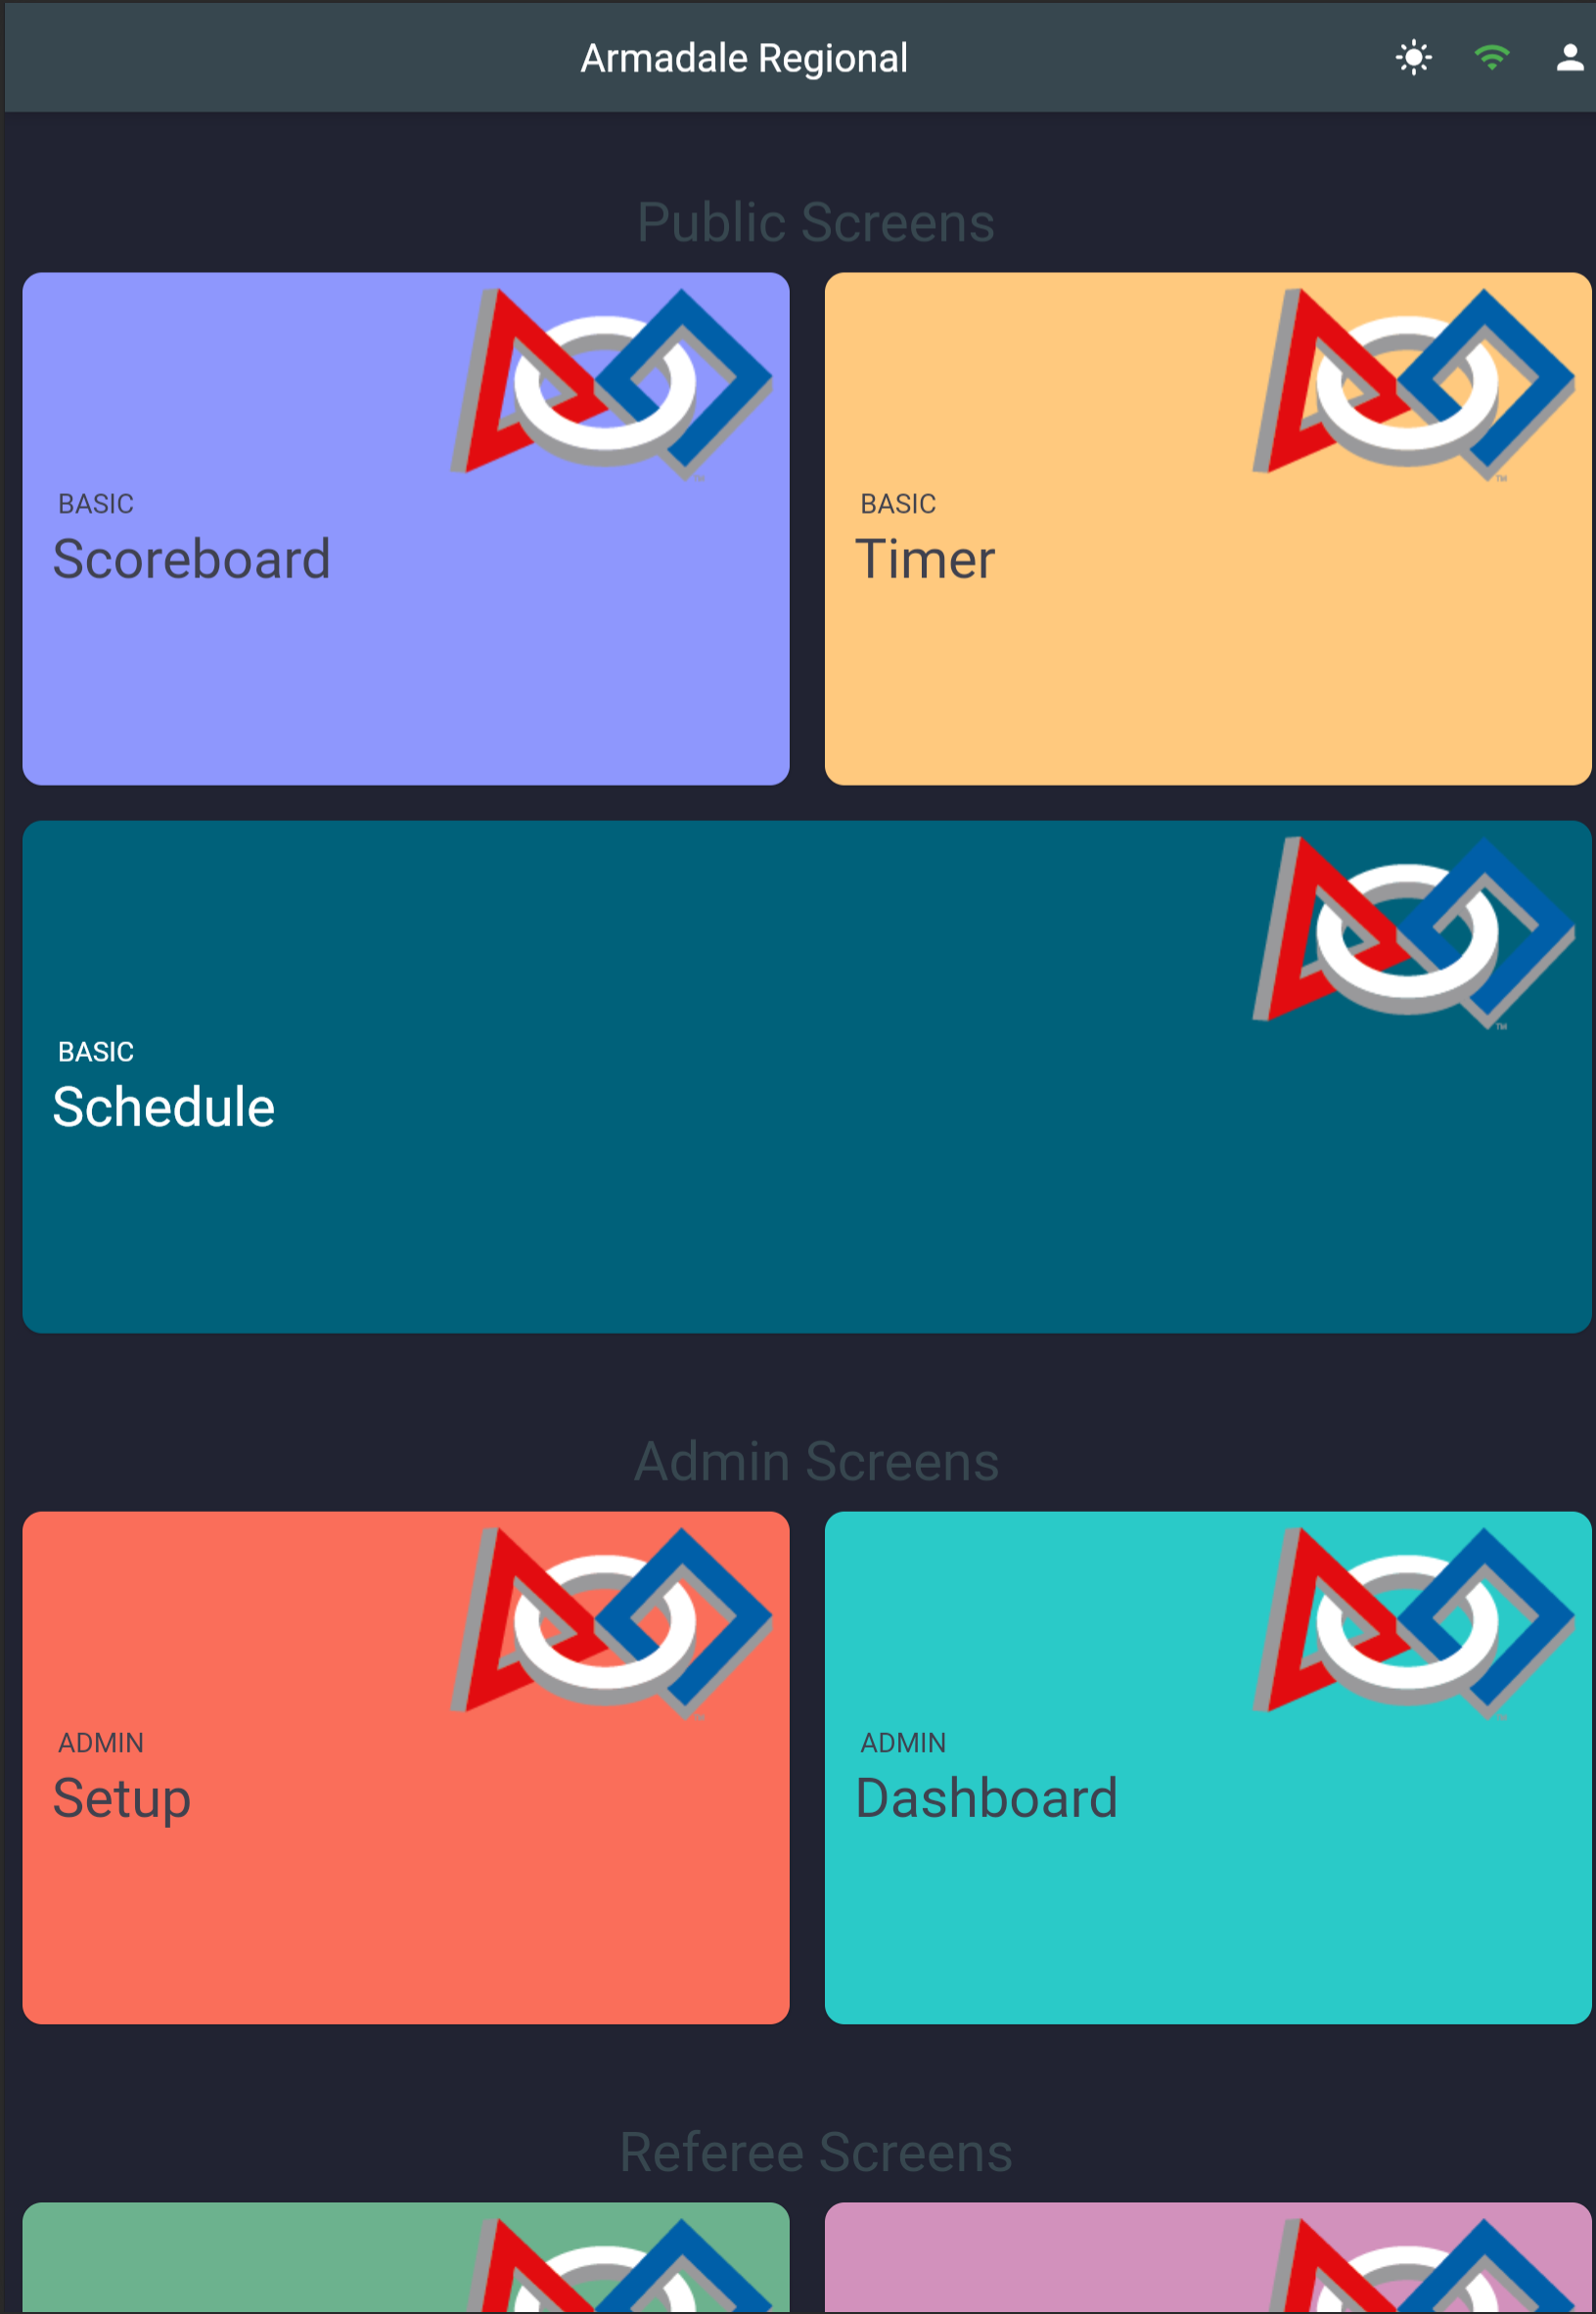
- After logging in go back to the view selector screen and click on
Setup - Provide the generated CSV for your event or create a new one using a supported FLL Schedule generator
- (Optional) Input an admin password, it's recommended but not essential. By default the password will stay as
password - (Optional) Input an event name
- Click submit and go back to the view selector.
- Note that the setup page is live, most of the options can be edited and submitted again during a running event with the exception of the CSV file which will overwrite the existing data.
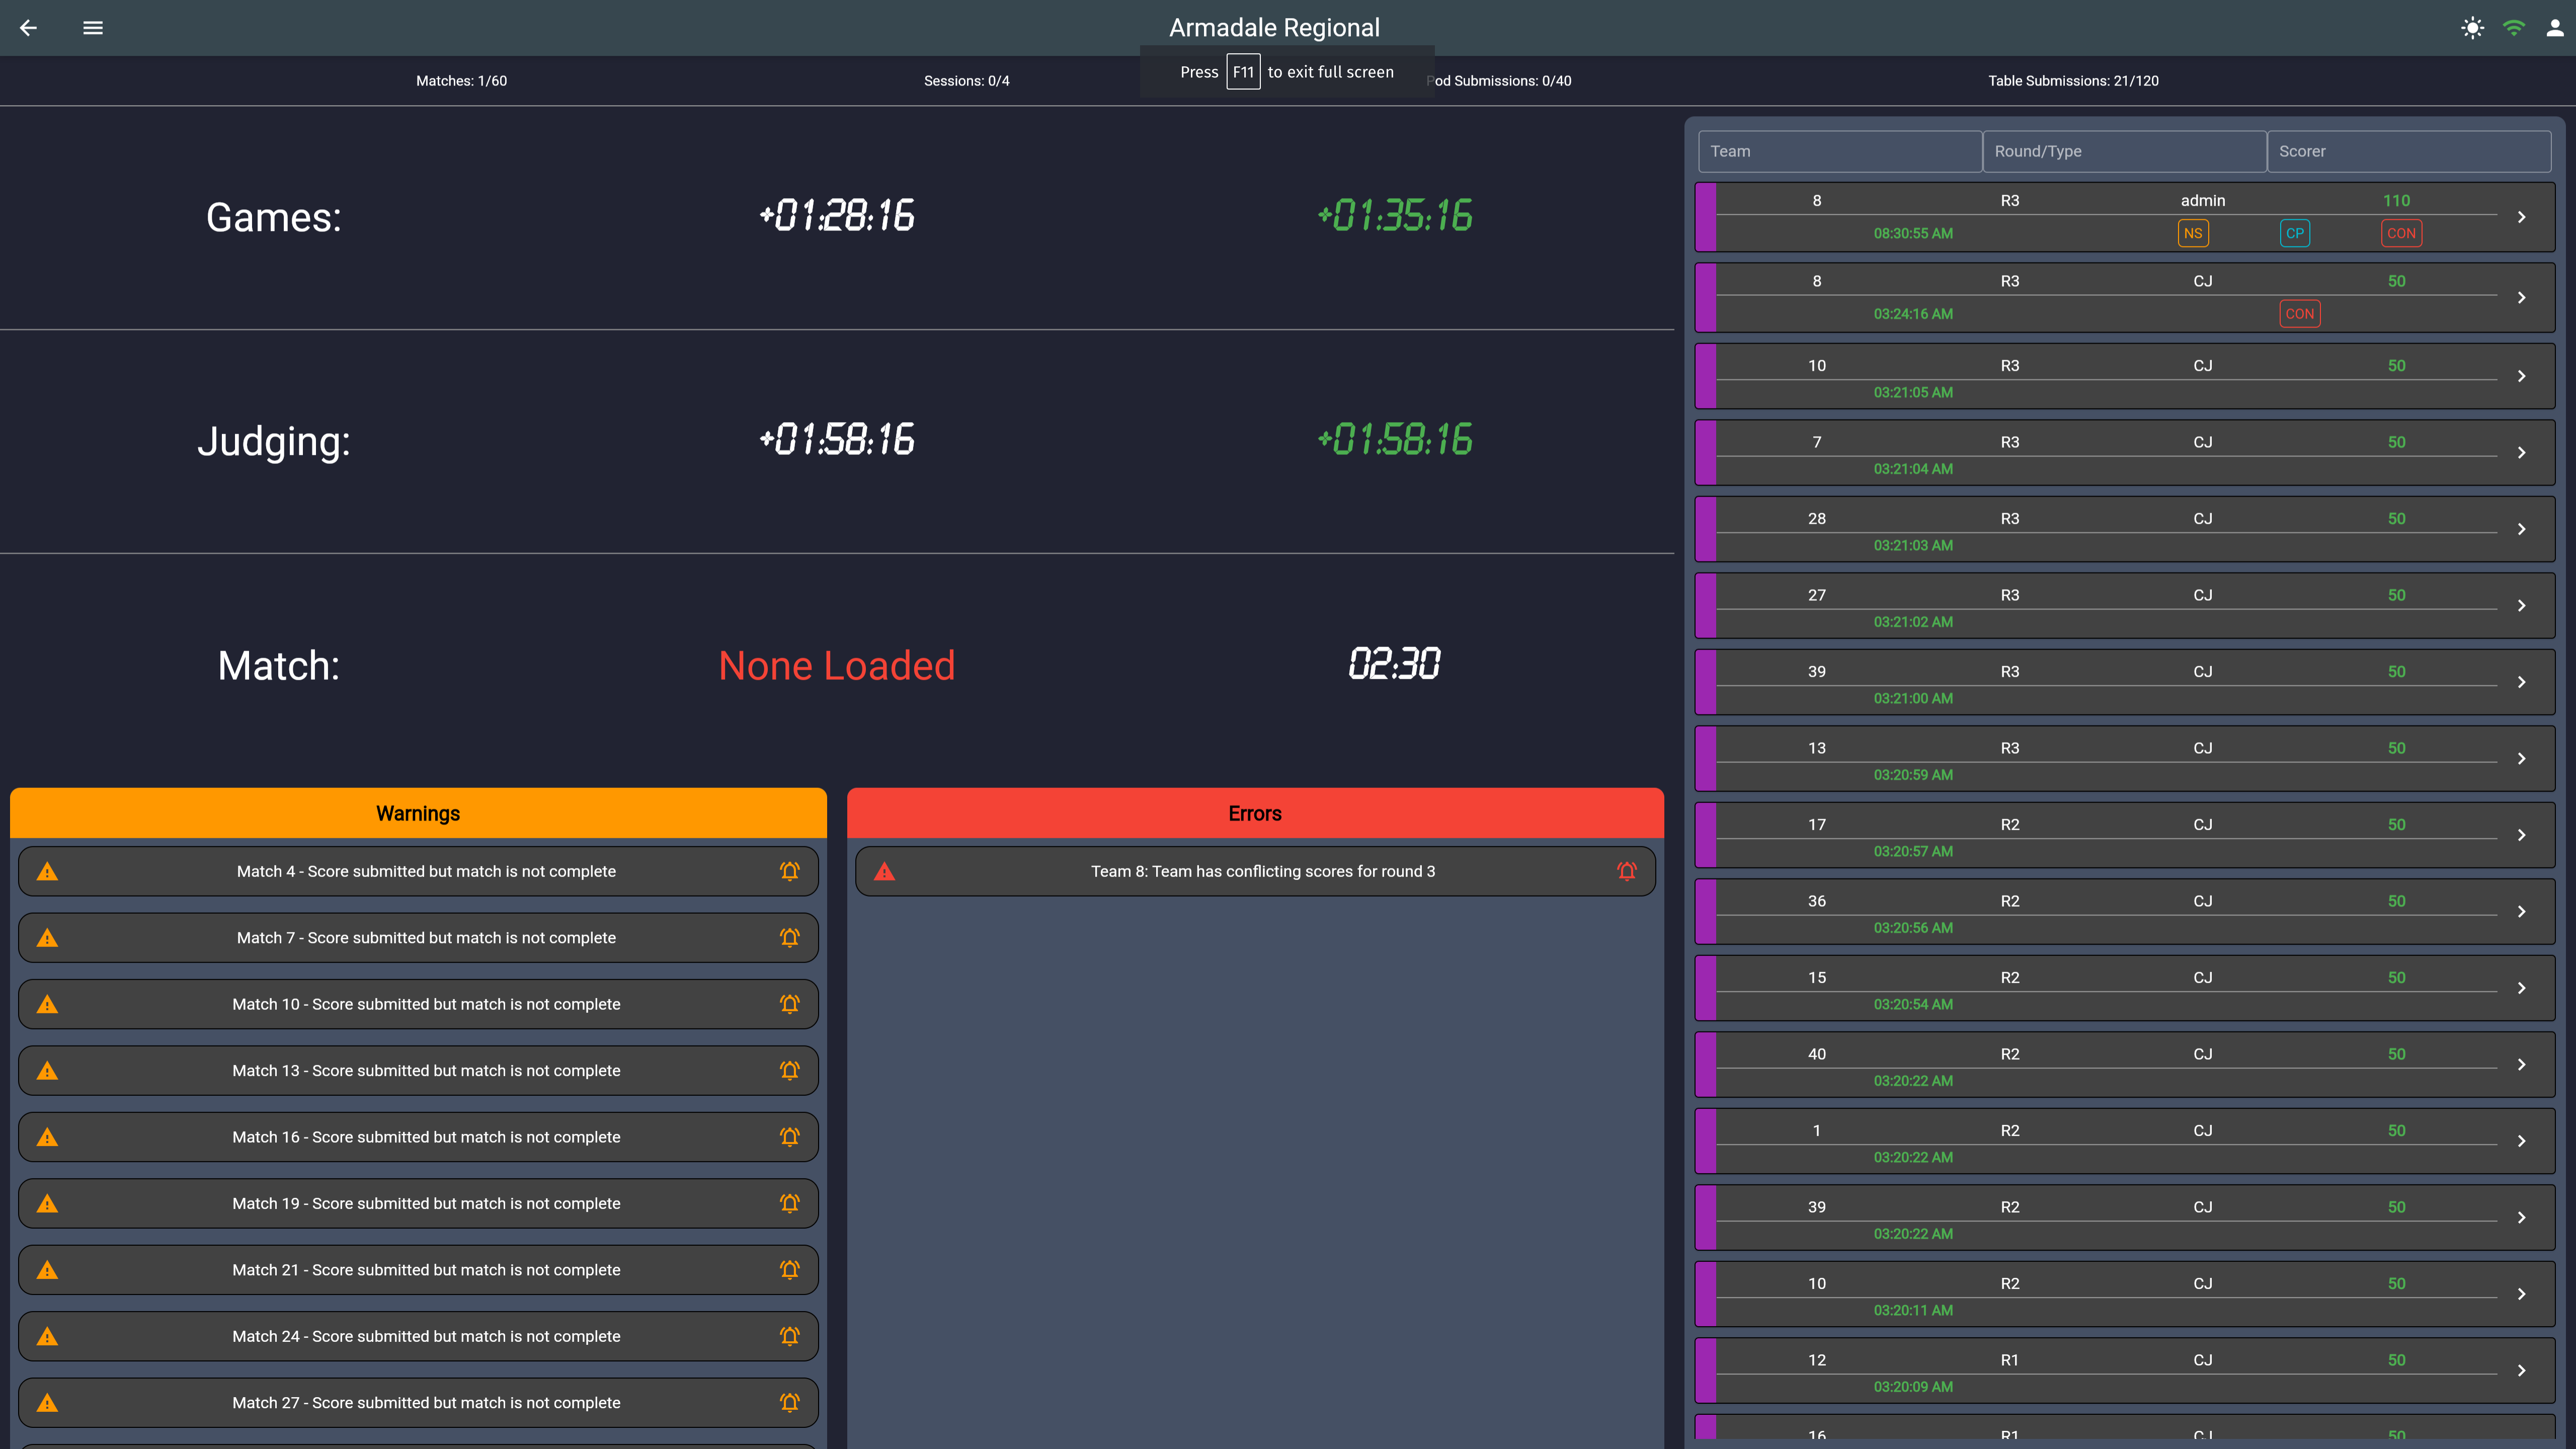
- Setup users by going to the
Dashboardpage and clicking on the menu icon in the top left. Then clickUsersin the drawer menu. - You can either create your own users by clicking on the
+or generate a set of default users for the event by clicking theAdd Defaultsbutton.- By default all generated users will have the password
passwordand should be changed to suite the event if needed.
- By default all generated users will have the password
- Once complete the system should be ready for event use.
- Chrome added an update in 2021 which stopped the use of auto play sounds without manual input of some kind. View Auto Play Policy C66 for more information.
- This causes sound to work briefly but when left alone may cut out as it can't be done without user input.
- To bypass this on a chromium browser you must whitelist the website and allow sound. Click the info icon/lock symbol left of the site url, and then navigate to site settings -> sound, and then change to allow.
- You should be able to reload and save. For every new ip address you will need to re-complete this action.
- TMS has sound on any view which has the timer clock
- Similar actions may need to be taken in safari and/or other untested browsers.
- Refer to the WIKI for detailed use